
Debugging Python FastAPI apps in Docker containers with Visual Studio Code
tl;dr: a modern IDE like Visual Studio Code can ease development and debugging of a dockerized application like the one I described before. The process is broken down in steps, but some basic level of familiarity with that project, working knowledge of Docker and debugging in Python is assumed.
When developing machine learning-powered applications, encapsulating them in Docker containers offers clear advantages:
- Docker allows apps to sit in reproducible environments: operating systems, language versions and distributions, library versions, are specified in the
Dockerfileand other configuration files within the container (for example, Python packages are often specified inrequirements.txt). The environment is thus configured as the container is built. This mechanism allows collaborators (and your future self!) to easily run code on any machine with enough resources capable of running Docker, and also simplifies quick deployment in the cloud. - Docker allows to develop apps in isolated environments: each app can be developed and run in its very own “separate compartment”, not needing to share a environment that may get messier and messier and outright impossible to maintain over time.
How do you fix a ship if it’s inside a bottle?
There’s a small catch though: it can be cumbersome to develop code of a containerized application, because outside the container there won’t be an environment able to run it. For example, to see how newly applied code changes affect the behavior of the app one would need to rebuild and rerun the container, and this can be slow and inefficient.
Working locally on code which eventually will be running in a container can feel a bit like building and upgrading a model ship that needs to fit inside a bottle: one can build the ship (create the initial version of the code), put it in the bottle (build the container with the code) check if it fits inside nicely (run the code successfully in the container). However, if the ship doesn’t fit (the code crashes) or needs upgrades (new functionality), one needs to take it out and then inside the bottle again (modify the code, build and rerun the container), and again, and again…

Wouldn’t it be nice to… magically enter the bottle and carry out all the desired changes to the ship while inside the bottle? The coding equivalent of this idea is remote development in containers. Through development in containers one can perform code changes from within a container and when done with modifications, voilà, the updated application is ready to be run and deployed!
In what follows, I’ll describe an example of development in containers using Visual Studio Code (VS Code). VS Code is a popular code editor developed by Microsoft which enables development in containers via one of its extensions (note that some of the content here may become obsolete as new versions of the editor and extensions are released).
A concrete case
I recently published on GitHub a simple example of dockerized API based on FastAPI and streamlit. Very soon somebody noticed that the code was affected by a bug that made it struggle when handling some input. My “ship in the bottle” had a flaw that needed a fix.
How to analyze the buggy behavior?
How to come up with the changes needed to fix the bug?
How to add new features and improvements?
In what follows I tackle those questions for that code example and FastAPI specifically. However, with relatively minor changes, one can debug a dockerized Python app in a similar way.
Entering the “bottle”
To begin (check also this screencast to watch how the steps below play out in VS Code):
- make sure to have a recent version of VS Code installed (downloadable here) on a machine that can run Docker applications;
- clone the repo to be modified. To follow along, use commands below to load the “buggy” version of my code that needs improvement:
    git clone https://github.com/davidefiocco/streamlit-fastapi-model-serving
    git checkout 563ae1418d32ed36bda75bd4cb6c973b3d9d1cdb
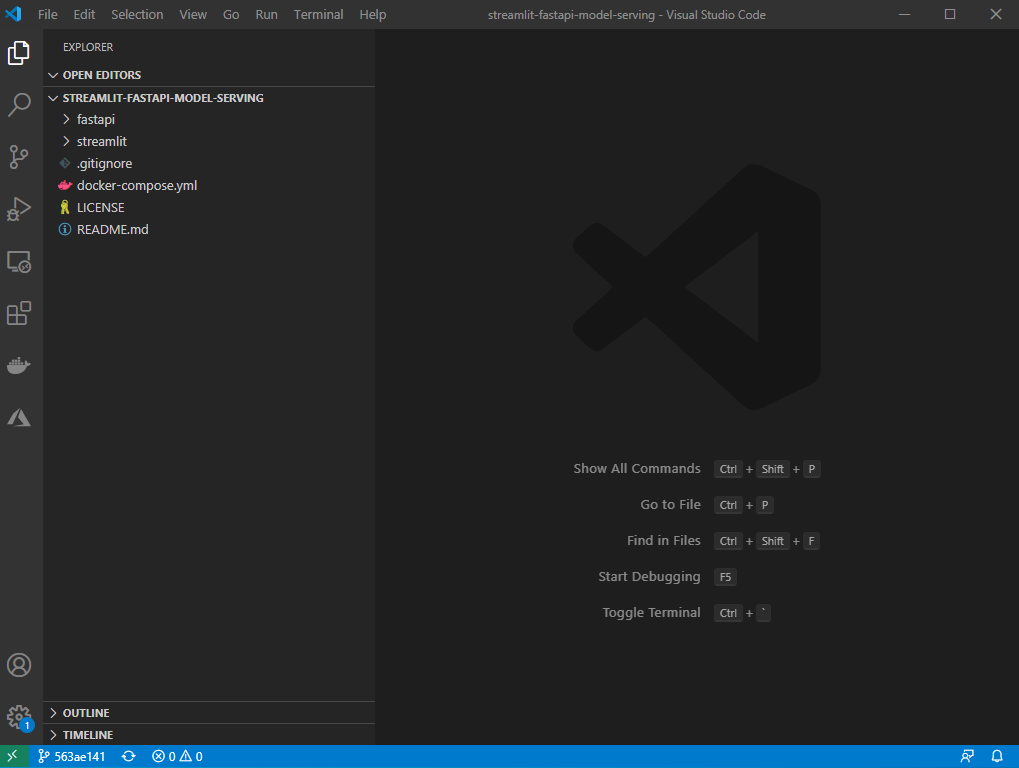
- open the freshly-cloned
streamlit-fastapi-model-servingfolder in VS Code; - install the VS Code extension for development in containers;
- click the green button in the bottom-left of VS Code and select the option
Remote-Containers: Reopen in Containerfrom the dropdown menu, selectingFrom 'docker-compose.yml'andfastapias additional option (I choosefastapias I assume that’s the one that needs a fix).
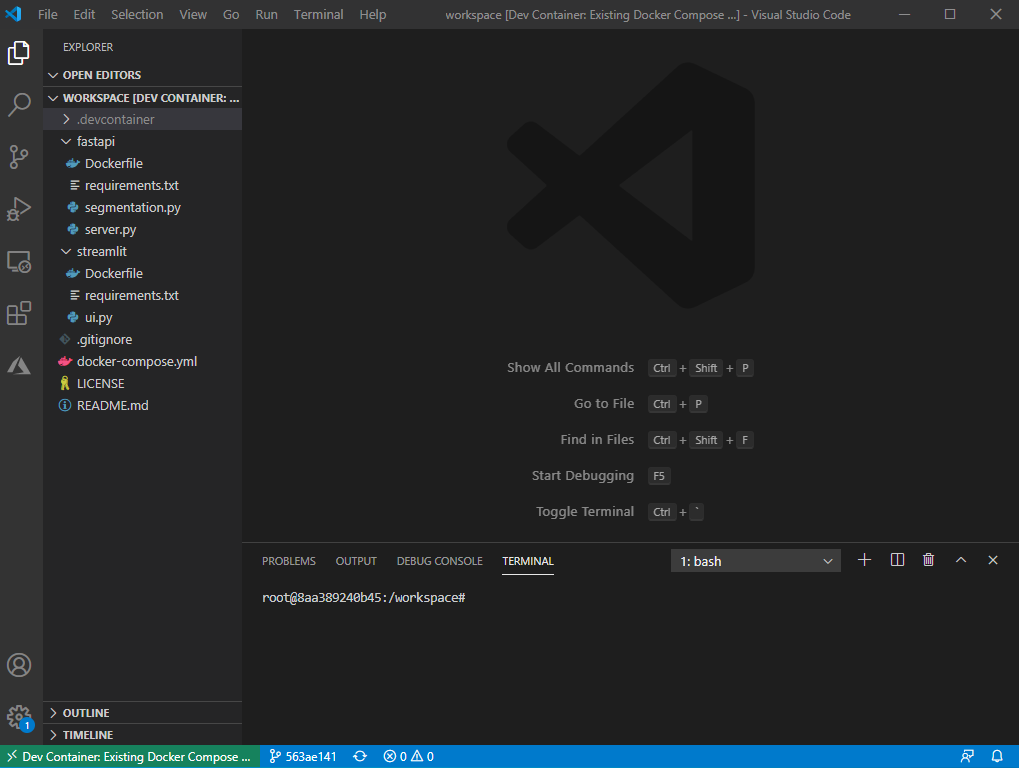
In this way, we’ve… entered “inside the bottle”! The VS Code instance is running within the fastapi container, and the code can be modified and run within it. Incidentally, by launching a terminal inside VS Code, one can also navigate the filesystem of the container.
Preparing to debug in the container
To understand what problems the code has, the VS Code Python debugger can be a helpful tool.
To start working with the debugger with FastAPI, some prerequisites need to be satisfied (see screencast for a visual walkthrough):
- install in the VS Code instance the VS Code Python extension, and reload VS Code;
- select a Python interpreter, which in this case is Python 3.7.7 in
/usr/local/bin; - from the “Run” menu of VS Code, select “Add configuration…” and “Python File”;
- (as we’re debugging a FastAPI API) follow the FastAPI debugging page, and perform the few code changes needed to allow debugging;
- in the file explorer (left side of VS Code), edit the file
devcontainer.jsonin the folder.devcontainerby uncommenting theforwardPortsattribute and set it to"forwardPorts": [8000]. This allows a web browser running locally to reach the 8000 container port exposing the FastAPI documentation page;
Once done with the above, troubleshooting can start! To do so, focus the file server.py and press F5. The app should start executing in debug mode and the FastAPI-generated swagger interface should be reachable with a web browser at http://localhost:8000/docs soon after.
Run in debug mode, and rock the ship!
Note that it’s possible to test the app by feeding it with images via the FastAPI-generated page, and step through the code with the VS Code Python debugger (pretty cool, uh?), as in this screencast (click here for a larger version):

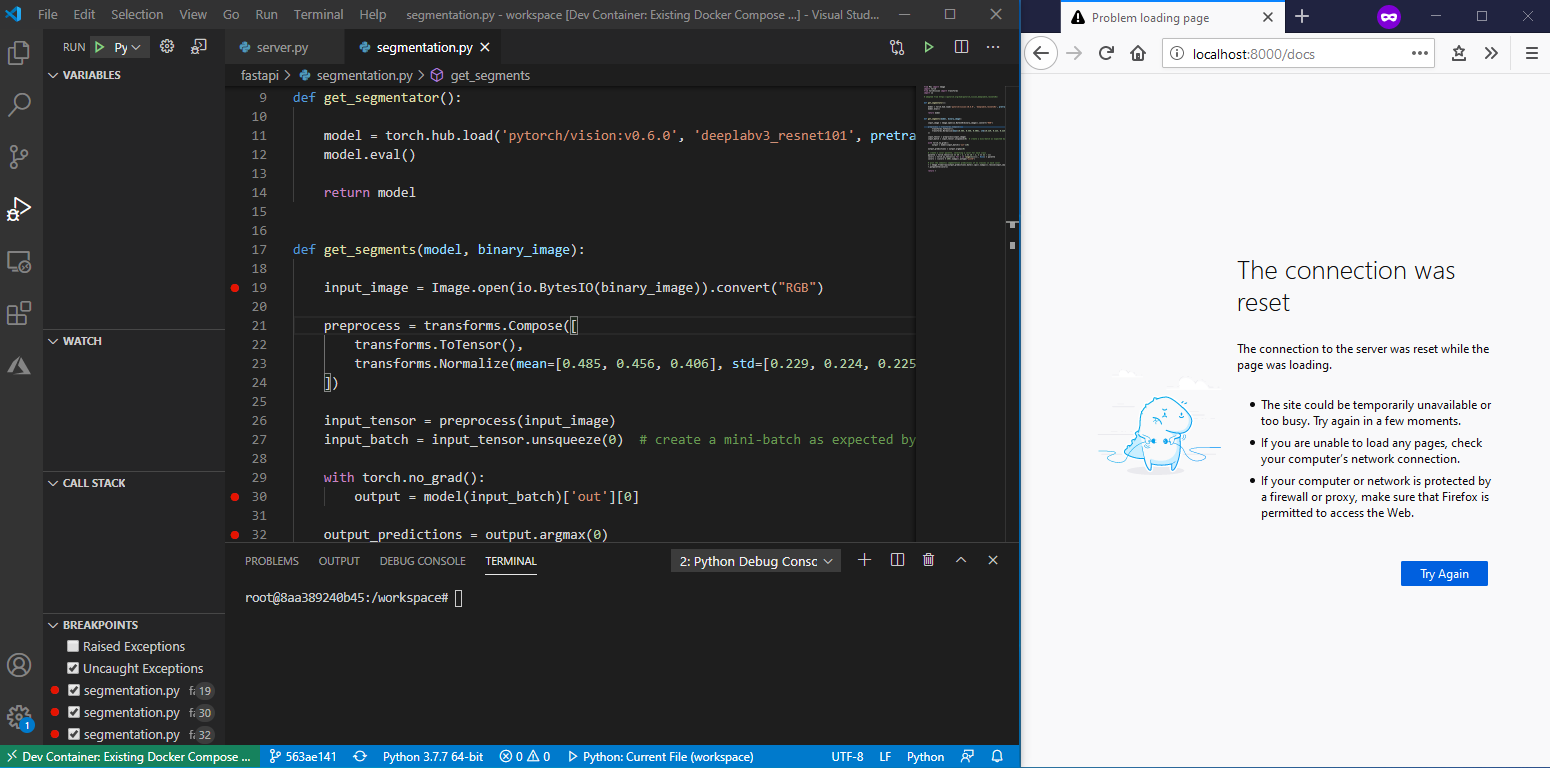
To do so I can place some breakpoints (the “red dots” on the left of the line numbers) at the lines where the Python execution should pause during debugging.
In my case, it makes sense to place breakpoints in segmentation.py (which contains the core PyTorch code), as that’s the part of the code where hiccups may occur.
If I pass to the http://localhost:8000/docs FastAPI frontend an “easy” image (say this example), execution happily progresses during debugging from breakpoint to breakpoint, while values of the variables are displayed on the left pane of VS Code. After the debugger has stepped past all breakpoints FastAPI displays output in the browser window. All looks OK!
If I try a more “challenging” high-res image instead, the debugger execution hangs a very very long time at the line where the model is invoked: thanks to the debugger, I discovered that something fishy is going on there that needs a fix! The debugger can now be stopped with Shift+F5.
Incidentally, as VS code brings up the streamlit container as well from docker-compose.yml, I can trigger requests from the streamlit UI as well, as below (click here for a larger version):

Coming up with a fix
I am thus all set to fix the problem, following a debugging procedure:
- Do some code change (hopefully in the right direction!) and save the corresponding files;
- Run the debugger for
server.py(pressing F5); - Execute an API call via the http://localhost:8000/docs using a “problematic” image as input;
- Make the execution progress through the debugger and observe the outcome.
The steps above can be repeated until the API behaves as expected. Note that there’s no container rebuilding needed in any of the above, and so experimenting with any wild idea is pretty efficient.
One possible fix (see the corresponding PR on GitHub) consists in changing segmentation.py:
def get_segments(model, binary_image):

    input_image = Image.open(io.BytesIO(binary_image)).convert("RGB")
adding a few lines of code to perform an image resize, so to create a smaller resized_image to be fed to the PyTorch model:
def get_segments(model, binary_image, max_size=512):

    input_image = Image.open(io.BytesIO(binary_image)).convert("RGB")
    width, height = input_image.size
    resize_factor = min(max_size/width, max_size/height)
    resized_image = input_image.resize((int(input_image.width*resize_factor), int(input_image.height*resize_factor)))
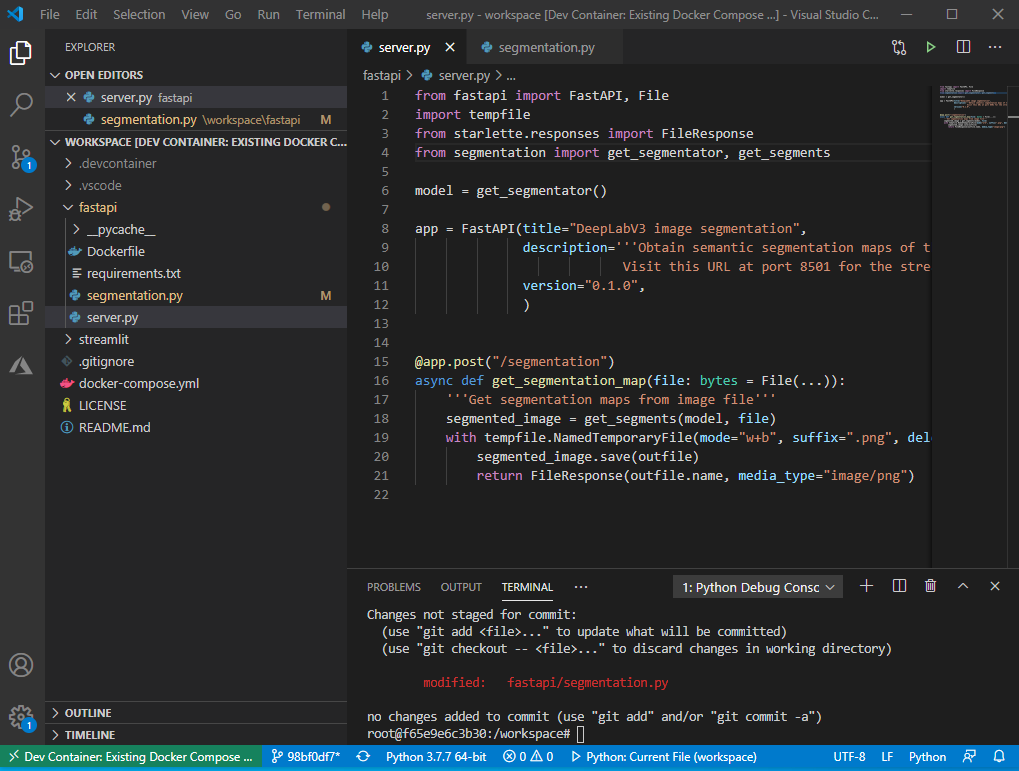
After having performed the change, I can run a final debugging round and check that the code runs without major hiccups. The bug seems indeed solved! So, after having configured git (if this wasn’t done before) I can commit the updated version of the code and push it to GitHub.
That’s it! Note that one can keep upgrading the app indefinitely in the same fashion, by performing more and more changes and commits.
Sail away
I’ve just scratched the surface of what can be done when developing and debugging Python APIs running on Docker with tools like VS Code. Feel free to send feedback via the Twitter handle below, or by filing an issue! Here are some reference links for more material:
- Python development in VS Code as presented at Microsoft’s Build May 2020 event by @luumelo14: https://channel9.msdn.com/Events/Build/2020/BOD100
- Python debugging in VS Code: https://code.visualstudio.com/docs/python/debugging
- Remote development in containers: https://code.visualstudio.com/docs/remote/containers
- Debugging FastAPI apps: https://fastapi.tiangolo.com/tutorial/debugging/