Machine learning model serving in Python using FastAPI and streamlit
tl;dr: streamlit, FastAPI and Docker combined enable the creation of both the frontend and backend for machine learning applications, in pure Python. Go straight to the example code!
In my current job I train machine learning models. When experiments show that one of these models can solve some need of the company, we sometimes serve it to users in the form of a “prototype” deployed on internal servers. While such a prototype may not be production-ready yet, it can be useful to show to users strengths and weaknesses of the proposed solution and get feedback so to release better iterations.
Such a prototype needs to have:
- a frontend (a user interface aka UI), so that users can interact with it;
- a backend with API documentation, so that it can process a lot of requests in bulk and moved easily to production and integrated with other applications later on.
Also, it’d be nice to create these easily, quickly and concisely, so that more attention and time can be devoted to better data and model development!
In the recent past I have dabbled in HTML and JavaScript to create UIs, and used Flask to create the underlying backend services. This did the job, but:
- I could just create very simple UIs (using bootstrap and jQuery), but had to bug my colleagues to make them functional and not totally ugly.
- My Flask API endpoints were very simple and they didn’t have API documentation. They also served results using the server built-in Flask which is not suitable for production.
What if both frontend and backend could be easily built with (little) Python?
You may already have heard of FastAPI and streamlit, two Python libraries that lately are getting quite some attention in the applied ML community.
FastAPI is gaining popularity among Python frameworks. It is thoroughly documented, allows to code APIs following OpenAPI specifications and can use uvicorn behind the scenes, allowing to make it “good enough” for some production use. Its syntax is also similar to that of Flask, so that it’s easy to switch to it if you have used Flask before.
streamlit is getting traction as well. It allows to create pretty complex UIs in pure Python. It can be used to serve ML models without further ado, but (as of today) you can’t build REST endpoints with it.
So why not combine the two, and get the best of both worlds?
A simple “full-stack” application: image semantic segmentation with DeepLabV3
As an example, let’s take image segmentation, which is the task of assigning to each pixel of a given image to a category (for a primer on image segmentation, check out the fast.ai course).
Semantic segmentation can be done using a model pre-trained on images labeled using predefined list of categories. An example in this sense is the DeepLabV3 model, which is already implemented in PyTorch.
How can we serve such a model in an app with a streamlit frontend and a FastAPI backend?
One possibility is to have two services deployed in two Docker containers, orchestrated with docker-compose:
version: '3'

services:
  fastapi:
    build: fastapi/
    ports:
      - 8000:8000
    networks:
      - deploy_network
    container_name: fastapi

  streamlit:
    build: streamlit/
    depends_on:
      - fastapi
    ports:
        - 8501:8501
    networks:
      - deploy_network
    container_name: streamlit

networks:
  deploy_network:
    driver: bridge
The streamlit service serves a UI that calls (using the requests package) the endpoint exposed by the fastapi service, while UI elements (text, file upload, buttons, display of results), are declared with calls to streamlit:
import streamlit as st
from requests_toolbelt.multipart.encoder import MultipartEncoder
import requests
from PIL import Image
import io

st.title('DeepLabV3 image segmentation')

# fastapi endpoint
url = 'http://fastapi:8000'
endpoint = '/segmentation'

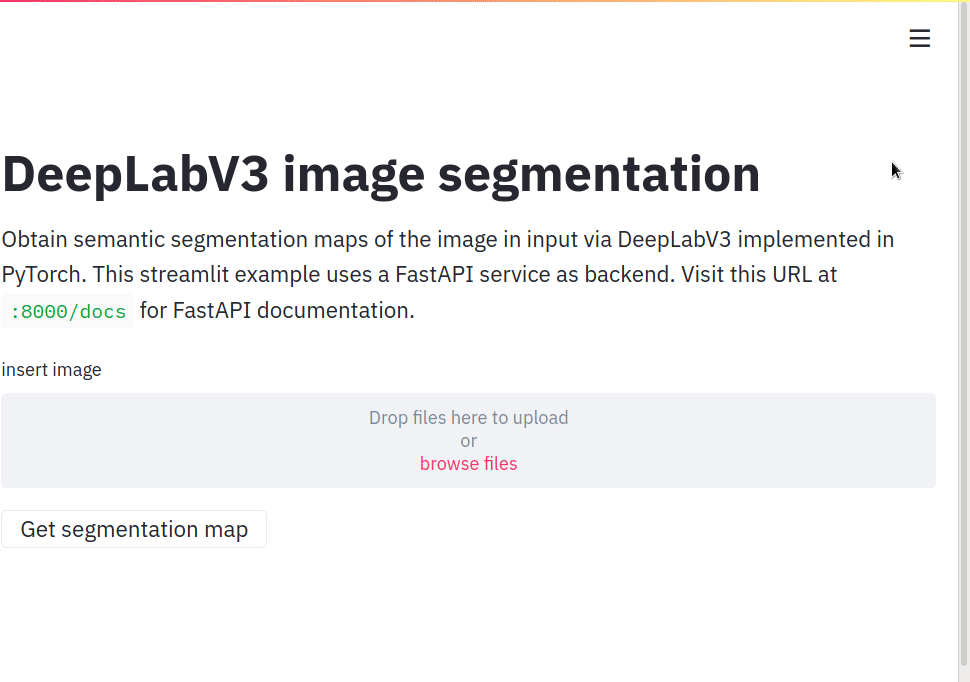
st.write('''Obtain semantic segmentation maps of the image in input via DeepLabV3 implemented in PyTorch.
         This streamlit example uses a FastAPI service as backend.
         Visit this URL at `:8000/docs` for FastAPI documentation.''') # description and instructions

image = st.file_uploader('insert image')  # image upload widget


def process(image, server_url: str):

    m = MultipartEncoder(
        fields={'file': ('filename', image, 'image/jpeg')}
        )

    r = requests.post(server_url,
                      data=m,
                      headers={'Content-Type': m.content_type},
                      timeout=8000)

    return r


if st.button('Get segmentation map'):

    if image == None:
        st.write("Insert an image!")  # handle case with no image
    else:
        segments = process(image, url+endpoint)
        segmented_image = Image.open(io.BytesIO(segments.content)).convert('RGB')
        st.image([image, segmented_image], width=300)  # output dyptich
The FastAPI backend calls some methods from an auxiliary module segmentation.py (which is responsible for the model inference using PyTorch), and implements a /segmentation endpoint giving an image in output (handling images with FastAPI can definitely be done):
from fastapi import FastAPI, File
from starlette.responses import Response
import io
from segmentation import get_segmentator, get_segments

model = get_segmentator()

app = FastAPI(title="DeepLabV3 image segmentation",
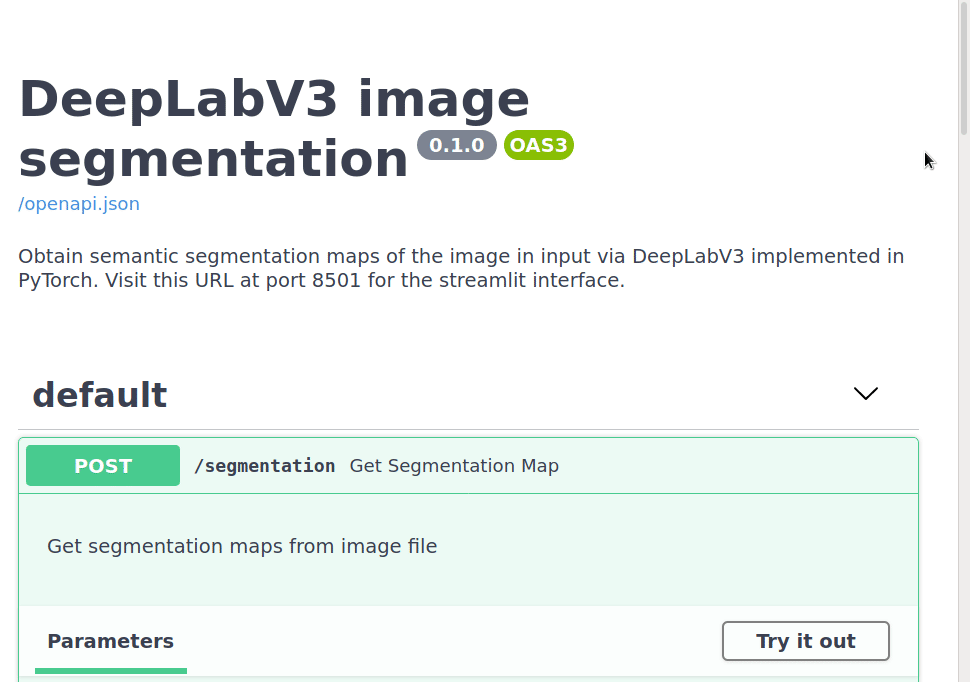
              description='''Obtain semantic segmentation maps of the image in input via DeepLabV3 implemented in PyTorch.
                           Visit this URL at port 8501 for the streamlit interface.''',
              version="0.1.0",
              )


@app.post("/segmentation")
def get_segmentation_map(file: bytes = File(...)):
    '''Get segmentation maps from image file'''
    segmented_image = get_segments(model, file)
    bytes_io = io.BytesIO()
    segmented_image.save(bytes_io, format='PNG')
    return Response(bytes_io.getvalue(), media_type="image/png")
One just needs to add Dockerfiles, pip requirements and the core PyTorch code (stealing from the official tutorial) to come up with a complete solution.
Note that we’re dealing with images in this example, but we could definitely modify it to use other kind of data in input and output!
To test the application locally one can simply execute in a command line
    docker-compose build
    docker-compose up
and then visit http://localhost:8000/docs with a web browser to interact with the FastAPI-generated documentation, which should look a bit like this:

The streamlit-generated page can be visited at http://localhost:8501, and after uploading an image example and pressing the button, you should see the original image and the semantic segmentation generated by the model:

One can try to run the model on more images to experiment with its strengths and weaknesses (in that case, one should remember that classes used in the segmentation are those of the PASCAL VOC 2012 dataset).
With essentially no changes, it’s then possible to deploy the application on the web (e.g. with Heroku). Note that quite some elements are still missing to consider it a full-blown production application: secure authentication (which can be enabled via FastAPI), ability to handle concurrent requests under heavy load, dealing reliably with multiple image formats and sizes, monitoring, logging,… some of which could be dealt with in another post!
Still, it’s impressive how not-so-basic ML applications can be created with so little Python code!
